

Table of Contents
- What You'll Need to Return Online Clothes Easily
- Step 1: Review the Return Policy Before You Start
- Step 2: How to Print Return Labels at Home
- Step 3: Prepare Your Clothes for Return Packaging
- Step 4: Drop Off Your Package and Track the Return
- Refund Processing Time Expectations: What Happens Next
- Online Return Policy Best Practices for Smooth Exchanges
- Troubleshooting Denied Returns and Lost Packages
- Frequently Asked Questions
Last Updated: September 8, 2026
Returning online clothes easily starts with understanding that most hiccups happen before you ever seal the box. The process is straightforward when you know where to look for the policy, how to generate a label, and what condition your items need to be in. This guide walks through each step so you can send back that ill-fitting jacket or wrong-size jeans without frustration, wasted time, or lost refunds.
Most shoppers assume returns are painful because they wait until after the package arrives to think about them. The smarter approach is to check the return policy the moment you place the order. That single habit eliminates the majority of return headaches, including missed windows, missing tags, and unexpected restocking fees.
What You'll Need to Return Online Clothes Easily
To return online clothes easily, gather these items before you start the process. Having everything ready in one place saves you from mid-task interruptions and lost paperwork.
- Order confirmation or receipt: Most retailers require proof of purchase, found in your email inbox or the account section of the retailer's website.
- Return authorization: Many stores require you to initiate the return through their return portal before shipping anything back.
- Shipping label: Usually provided as a downloadable PDF after you submit your return request.
- Original packaging or a suitable box: Something sturdy enough to protect the garment during transit.
- Tags and original accessories: Belts, extra buttons, or detachable hoods must go back with the item.
- Tracking number: Received after dropping off the package; keep it until the refund posts.
A common mistake is assuming you need the original shipping box. You do not. Any clean, sturdy box works as long as the garment is protected and the label is visible.
Step 1: Review the Return Policy Before You Start
The return policy dictates everything: the return window, condition requirements, who pays for shipping, and whether you get a refund or store credit. Locate it in your order confirmation email or on the retailer's website under their returns or help section.
Pay close attention to three details: the return window (often 14 to 60 days from delivery, not purchase), the condition requirements (unworn clothing with tags and original packaging), and the refund method (original payment, store credit, or a restocking fee).
If you ordered from a marketplace hosting multiple sellers, check whether each item has its own return policy, as some sellers have stricter windows or different return shipping costs.
Step 2: How to Print Return Labels at Home
Printing return labels at home is the fastest way to get your return moving, but the workflow depends on which carrier your retailer uses. After submitting your return request, you will typically receive an email with a link to download a prepaid shipping label as a PDF. Verify three things before printing: the return address matches yours, the destination matches the retailer's return warehouse, and the RMA number is legible.
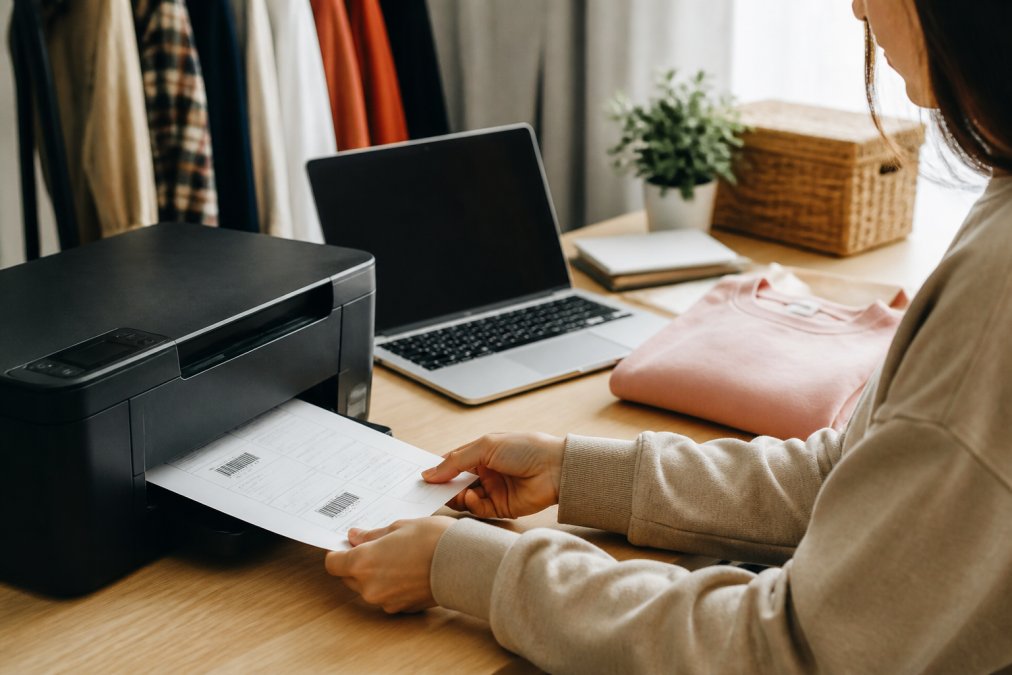
Use a standard inkjet or laser printer with plain white paper. Set the print scale to 100%, never "fit to page", because the barcode must remain at its original size to scan correctly. Trim along the dashed edges if your printer leaves a margin, but do not cut into the white space around the barcode.
If you do not have a printer, you have three label-less options that most major carriers now support:
- QR code drop-off: After initiating your return, the retailer or carrier emails you a QR code. At the carrier's retail location or self-service kiosk, scan the code from your phone, and the attendant or kiosk prints the label for you.
- Carrier app pickup: Both UPS and FedEx allow you to schedule a home pickup through their mobile apps. The driver scans the QR code from your phone when they arrive, eliminating the need for any printed paper.
- Drop-off without a label: Some retailers, including Amazon and Walmart, accept returns at their own store locations where staff scan a code from your phone and handle the labeling internally.
A common mistake is reusing a box with an old shipping label or barcode. Automated sorting systems read every barcode, and a leftover label can route your package to the wrong hub. Remove the old label completely, or cover it with black marker and opaque tape.
For high-value items over $200, use the carrier's full-service counter rather than a self-service kiosk. The attendant provides a printed receipt with the tracking number, which is stronger proof of drop-off if a dispute arises. For lower-value items, a kiosk receipt photo is sufficient.
If your return label came from a marketplace like eBay or Etsy, double-check whether it is for the marketplace's consolidated return center or the individual seller's address. Marketplaces often route returns through a central facility first, and sending directly to the seller can delay your refund by a week or more.
Step 3: Prepare Your Clothes for Return Packaging
Proper packaging protects the item and ensures it meets condition requirements. Fold the garment neatly, reattach any tags you removed, and include all original accessories like belts, sashes, or detachable hoods.
Place the item in a plastic bag if you have one to protect it from moisture, then in a sturdy box or poly mailer. Seal securely with packing tape and affix the label flat on the largest, cleanest surface. Cover any old labels or barcodes so sorting systems do not misroute your package.
A frequent issue is returning items that show signs of wear. Most retailers require unworn condition, no perfume, deodorant, or makeup residue, and no stretched fabric or scuffed soles. If the item arrived damaged, photograph it before packing, as you may need that evidence to dispute a claim or request a prepaid label.
Step 4: Drop Off Your Package and Track the Return
Once your package is sealed and labeled, choose a drop-off location. Confirm which carrier your label belongs to before visiting a drop-off point. Common options include the carrier's retail location, a staffed counter, or a self-service kiosk.
Hand the package to an attendant and request a receipt, which serves as proof of drop-off and includes the tracking number. If you use a self-service kiosk, take a photo of the confirmation screen. Keep this information until your refund posts.
After drop-off, track the package through the carrier's website or the retailer's return portal, which shows real-time updates including delivery and refund initiation. Checking a few days after drop-off confirms the package is moving and alerts you to delivery issues early.
Refund Processing Time Expectations: What Happens Next
Refund processing time expectations vary by retailer, but the typical timeline spans from a few days to two weeks after the package arrives at the warehouse. The clock starts when the retailer receives and inspects the item, not at drop-off.
Here is a realistic breakdown of the phases:
| Phase | Typical Duration | What Happens |
|---|---|---|
| Transit to warehouse | 2-5 business days | Carrier delivers your package |
| Package inspection | 1-3 business days | Staff checks condition and tags |
| Refund initiation | 1-2 business days | Refund is approved and sent |
| Bank processing | 3-5 business days | Funds appear on your statement |
The total time from drop-off to refund is usually 7-15 business days. Refunds to store credit often post faster than refunds to your original payment method, which must clear through your bank or card issuer.
Online Return Policy Best Practices for Smooth Exchanges
Online return policy best practices come down to documentation and timing. Shoppers who get refunds without friction keep their order confirmations, initiate returns promptly, and follow condition rules precisely.
Start a digital folder for your receipts. Screenshot or save every order confirmation email, as these contain your order number, the return window, and the link to the return portal. When you initiate a return, note the return authorization number and any instructions provided.
For exchanges, the process is often faster if you return the unwanted item and place a new order separately. Many retailers do not offer direct exchanges, and waiting can delay your replacement by a week or more. Ordering the correct size immediately while your return is in transit gets you the right garment sooner.
Troubleshooting Denied Returns and Lost Packages
A denied return or lost package is frustrating, but you have a clear escalation path. Most denials fall into one of three categories: the item arrived after the return window closed, the retailer claims it shows signs of wear, or the package was lost in transit. Each requires a different response.
Step 1: Verify the Denial Reason Against the Policy
When a return is denied, the retailer must provide a reason. Ask for it in writing via email or chat transcript. Common denial reasons include:
- Return window expired: Check whether the window counts from the delivery date or the order date. Many retailers use delivery date, which gives you extra days. If the denial cites the wrong date, provide your tracking number showing the actual delivery date.
- Item shows wear: Retailers typically cite perfume odor, pet hair, stretched fabric, or scuffed soles. If you dispute this, your timestamped photos from before shipping are your primary evidence. Reference them explicitly in your reply.
- Missing tags or accessories: Some retailers accept the item with a partial refund or a restocking fee. Ask whether a deduction is possible before accepting the denial as final.
Step 2: Escalate Within the Retailer's System
If the first representative denies your appeal, ask to speak with a supervisor or the returns department manager. Provide a single, organized email containing:
- Your order number and return authorization number
- The original denial message
- Your timestamped photos of the item before shipping
- The carrier's delivery confirmation
- A screenshot of the return policy page showing the relevant clause
Most retailers will review a denial if you provide clear documentation. A common pattern is that the first representative applies a blanket policy without reviewing specifics, while a supervisor has authority to approve exceptions.
Step 3: Open a Carrier Trace for Lost Packages
If the tracking number shows no movement for five or more business days, contact the carrier directly to open a trace request. For USPS, file a missing mail search at the post office where you dropped it off. For UPS and FedEx, call customer service or file a claim online. The retailer is the carrier's customer, not you, so the retailer may need to initiate the trace, ask them to do so if the carrier refuses to work with you directly.
Step 4: Dispute the Charge With Your Payment Provider
If the retailer refuses to resolve the issue and you have documentation showing you met the policy requirements, you can dispute the charge with your credit card issuer. Under the Fair Credit Billing Act, you have 60 days from the statement date to file a dispute for billing errors, including charges for goods you returned but did not receive credit for. Your card issuer will investigate and typically issue a temporary credit. This is a formal process, the issuer sends the retailer a written dispute notice, which often prompts a faster resolution than your own emails.
For PayPal purchases, open a dispute in the Resolution Center within 180 days of payment. For debit card purchases, the process is similar but the timeline is shorter, so act quickly.
Step 5: File a Complaint With the FTC
If the retailer is unresponsive and you believe they violated consumer protection rules, file a complaint with the FTC at ftc.gov. The FTC does not resolve individual disputes, but complaints contribute to enforcement patterns against repeat offenders. Some retailers respond more seriously when they receive an FTC complaint reference number.
Your escalation sequence should always be: retailer customer service → supervisor → carrier trace (if lost) → credit card dispute → FTC complaint. Each step takes 2-5 business days, so the full process takes about three weeks. Most disputes resolve at step two or four.
Frequently Asked Questions
Do I need the original packaging to return clothes?
You do not need the original shipping box, but you do need to return items in their original condition with tags attached. Use any sturdy box or poly mailer, and wrap the clothes to prevent damage. Include the original tags and any free gifts that came with the order. Some stores require the original packing slip, so check your order confirmation or return instructions first.
How long does it usually take to get a refund for online returns?
Most retailers process refunds within 3 to 5 business days after the package arrives at their warehouse. Your original payment method determines how quickly the money appears. Credit card refunds often post within 2 to 3 business days, while PayPal or bank transfers may take up to 10 days. Track your return to confirm delivery, then watch your refund status in the return portal.
What should I do if my return is denied?
Contact customer service with your order confirmation and tracking number. Ask for the specific reason, such as missing tags or a missed return window. If the item arrived damaged or defective, request a prepaid label and cite the store's policy. If you used a credit card, you may also file a dispute with your card issuer as a last resort.