

Table of Contents
- Decide Whether to Repair, Resole, or Replace Your Shoes
- Assess the Damage: Cracks, Holes, Worn Tread, or Sole Separation
- Choose the Best Glue for Shoe Sole Repair
- How to Patch a Hole in a Shoe Sole
- How to Fix a Separated Shoe Sole Step by Step
- Cost to Resole Shoes Versus DIY Repair
- Curing Times, Aftercare, and Preventing Repeat Wear
- Frequently Asked Questions
Decide Whether to Repair, Resole, or Replace Your Shoes
Last Updated: November 1, 2026
Before you reach for glue, decide whether the shoe is worth saving, because learning how to repair worn out shoe soles only pays off on the right pair. A worn sole on an inexpensive pair of sneakers may not justify hours of work, while a higher-priced pair of leather boots often does. Most people skip this step and end up with a repair that fails within a week.
Start with three questions. Is the upper still in good shape? Does the shoe fit well? Do you still like wearing it? If the answer to all three is yes, repair is usually worth trying.
- Repair at home: Small holes, minor sole separation, or light tread wear
- Take to a cobbler: Deep wear, stitched soles, or leather shoes you want to keep long-term
- Replace: Torn uppers, broken arches, or soles that are worn through to the insole
Assess the Damage: Cracks, Holes, Worn Tread, or Sole Separation
Look closely at the sole before you buy any supplies, since knowing how to repair worn out shoe soles starts with identifying the damage. Different problems need different fixes.
Press on the sole and check for gaps. Flex the shoe and watch where it bends. Cracks often form at the flex point, usually near the ball of the foot.
- Cracks: Thin lines in rubber or foam, often shallow
- Holes: Openings that go through the outsole into the midsole or insole
- Worn tread: Smooth areas with little grip, usually at the heel or the ball of the foot
- Sole separation: The rubber pulls away from the upper, often at the toe or edges
Uneven wear is a clue. If the outer heel wears faster, your gait may be pushing weight to one side. Fixing the sole alone will not stop that pattern, so note where the wear shows up.
Choose the Best Glue for Shoe Sole Repair
Adhesive choice is where most DIY sole repairs fail. The glue has to match the sole material, the flex pattern of the shoe, and the size of the gap you are filling. Buying the wrong chemistry is the single most common reason a patch peels off within a week.
Match the adhesive to the sole material
| Sole material | Best adhesive type | Avoid | Why |
|---|---|---|---|
| Rubber (vulcanized, carbon rubber) | Contact cement (neoprene or polychloroprene) | Rigid epoxy, cyanoacrylate (super glue) | Contact cement stays flexible and bonds rubber to rubber and rubber to leather |
| Leather (outsole or midsole) | Contact cement or flexible urethane shoe glue | Super glue | Leather flexes; brittle glues crack at the flex point |
| EVA foam and phylon | Flexible urethane adhesive labeled for foam | Standard rubber contact cement | Many rubber cements attack or fail to bond EVA |
| Polyurethane (PU) | Polyurethane adhesive or flexible urethane shoe glue | Solvent-heavy contact cement | PU needs a compatible chemistry to avoid a weak bond |
| TPU and injected plastic | Abrasion-resistant flexible urethane | Rigid epoxy | TPU is slick; only flexible urethanes hold under flex |
If you are unsure what the sole is made of, check the inside of the tongue or the sidewall stamp. Most athletic shoes list the midsole material (EVA, phylon, or PU) on the label.
The three adhesive families you will actually see
- Contact cement (neoprene): The workhorse for sole separation. You coat both surfaces, let them dry until tacky, then press. It bonds on contact, so you get one shot at alignment. Best for rubber-to-rubber and rubber-to-leather.
- Flexible urethane shoe glue (Shoe Goo-style): Thicker, gap-filling, and more forgiving on alignment. Good for patching holes, rebuilding worn heels, and bonding foam. It cures slower, so clamping matters more.
- Two-part epoxy: Strong and rigid. Useful for hard heel blocks and structural repairs, but a poor choice anywhere the sole needs to flex, because it cracks.
What to check on the label
- Flexibility after cure: Look for 'flexible,' 'remains flexible,' or 'for flexible materials.'
- Bond strength and gap fill: Thick gels fill cracks; thin contact cements are for tight, clean separations.
- Cure time and clamp time: Contact cement needs 10-30 minutes of tack time; urethane glues often need 24 hours before normal wear.
- Solvent content: Strong solvents (toluene, acetone) work fast but need ventilation and gloves; water-based options are gentler but slower.
- Temperature range: Most adhesives want application and cure above roughly 65°F. Cold garages produce weak bonds.
A practical buying rule
For a separated rubber sole, buy a contact cement made for shoe repair. For a hole or worn heel on an athletic shoe, buy a flexible urethane shoe glue. For leather boots, contact cement plus a clamp is usually enough. If the sole is foam or PU and you cannot find a foam-labeled adhesive, take the shoe to a cobbler rather than gamble on a rubber cement that may not bond.
adhesive manufacturer application guides
How to Patch a Hole in a Shoe Sole
A small hole can be patched with a rubber scrap or a repair compound. Here is the basic process:
- Clean the area. Wipe the hole and the area around it with isopropyl alcohol. Let it dry fully.
- Rough the surface. Scuff the edges with sandpaper so the glue has something to grip.
- Cut the patch. Use a rubber scrap or patch material slightly larger than the hole.
- Apply glue. Coat both the patch and the sole. Wait until the glue is tacky, not wet.
- Press firmly. Set the patch in place and press or clamp it for the time on the label.
- Let it cure. Keep the shoe off wet ground until the glue is fully set.
Watch out: Gluing over a wet or dusty surface can cause patches to peel off in the first few wears.
How to Fix a Separated Shoe Sole Step by Step
Sole separation is one of the most fixable problems, if you act early. Work slowly and keep the glue off the parts you do not want to bond.
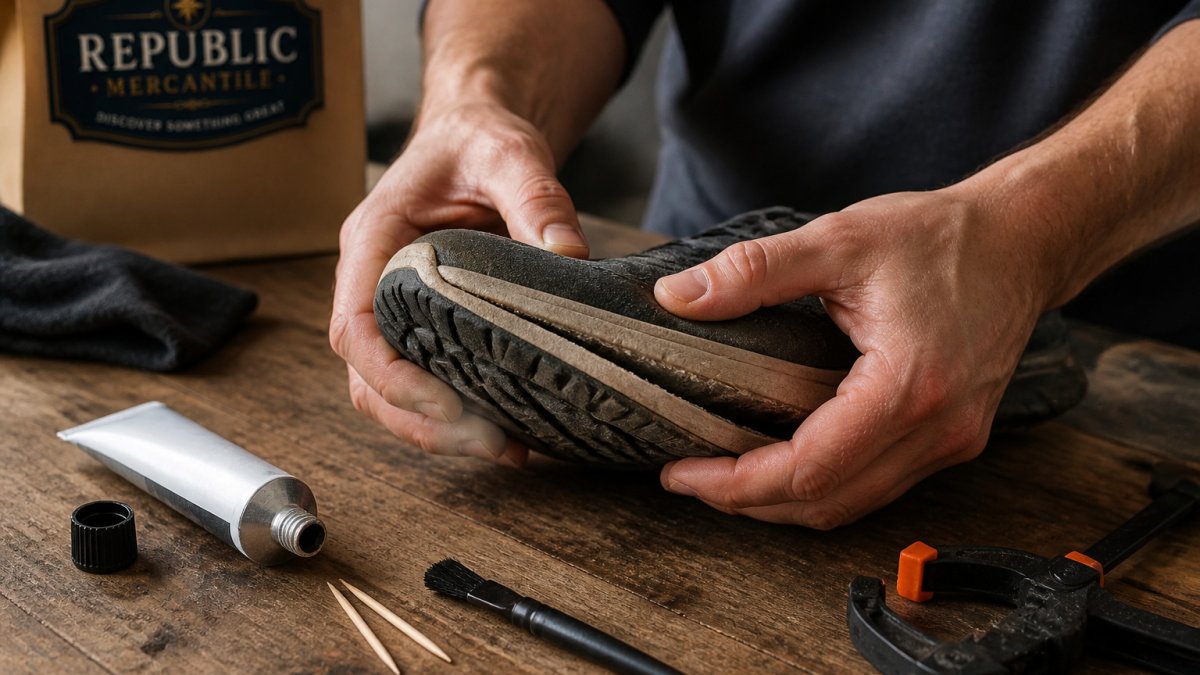
- Remove loose debris. Scrape away dirt, old glue, and crumbled rubber from both surfaces.
- Clean both sides. Wipe the sole and the upper with isopropyl alcohol and let them dry.
- Scuff the surfaces. Lightly sand both bonding areas to give the glue more grip.
- Apply a thin, even coat. Spread glue on both surfaces and let it turn tacky, usually a few minutes.
- Join the pieces. Press the sole onto the upper, lining up the edges carefully.
- Clamp and hold. Use clamps, tape, or heavy books wrapped in cloth to hold the shoe in place.
- Wait before wearing. Leave the shoe clamped until the adhesive has fully cured.
Watch out: Pressing too hard before the glue is tacky can squeeze out adhesive and weaken the bond.
Cost to Resole Shoes Versus DIY Repair
Most guides skip the math. Here is the honest comparison so you can decide before you buy supplies.
DIY repair: what you actually spend
| Item | Typical U.S. price | Notes |
|---|---|---|
| Flexible shoe glue or contact cement | $6-$12 per tube | One tube handles several small repairs |
| Rubber patch material or sole scrap | $5-$15 | Often sold as a kit with glue |
| Sandpaper (80-120 grit) | $3-$8 | A single sheet is enough for one pair |
| Clamps or tape | $0-$15 | Heavy books and painter's tape work fine |
| Isopropyl alcohol | $3-$6 | Already in most homes |
| Total first repair | $15-$40 | Supplies often cover 2-4 repairs |
Time: 30-60 minutes of active work, plus 24 hours of cure time before normal wear.
Expected lifespan of a DIY repair: A well-done contact-cement repair on a clean, dry separation typically holds for several months of normal walking. A patched hole in a high-flex area may last weeks to a few months. Repairs on wet-use or high-impact shoes (running, hiking) may be shorter-lived and are best treated as temporary.
Professional cobbler or resole
| Service | Typical U.S. price range | Turnaround |
|---|---|---|
| Re-glue a separated sole | $15-$40 | Same day to a few days |
| Patch a hole or rebuild a heel | $25-$60 | 2-5 days |
| Full resole (leather or rubber) | $60-$120+ | 1-2 weeks |
| Welt repair or structural rebuild | $100-$200+ | 1-3 weeks |
Pricing depends on shoe type, materials, and the amount of work required, so get a written quote before you decide. A full resole is often worth it on a high-quality pair of leather boots because the upper can outlast multiple soles.
Replacement math
Compare the cost of repair against the price of a comparable new pair. If the repair costs more than about half that price and the upper is already showing wear, replacing the shoes is usually the better choice.
Time and durability at a glance
| Method | Upfront cost | Active time | Cure/wait | Expected life |
|---|---|---|---|---|
| DIY glue and clamp | $15-$40 | 30-60 min | 24 hours | Months (normal use) |
| DIY patch | $15-$40 | 45-90 min | 24 hours | Weeks to months |
| Cobbler re-glue | $15-$40 | Drop-off | 1-5 days | 6-12+ months |
| Full resole | $60-$120+ | Drop-off | 1-2 weeks | 1-3+ years |
| Replace | $60-$300+ | Shopping time | None | Full new lifespan |
cobbler locator and repair pricing guidance
Curing Times, Aftercare, and Preventing Repeat Wear
Give the repair time to set. Most adhesives need several hours, and many need a full day before the shoe can take normal weight. Rushing this step is the main reason repairs fail.
- Keep the shoe dry and away from heat during curing
- Avoid wet pavement and gravel for at least 24 hours
- Check the bond gently after a day of light wear
Repeat wear often comes from the same habits. Rotate your shoes, replace worn insoles, and check the sole every few weeks. Catching a small crack early is far easier than fixing a separated sole later.
Frequently Asked Questions
How can I repair a worn-out shoe sole at home?
Clean the sole thoroughly with isopropyl alcohol and let it dry completely. For light wear, roughen the surface and apply a flexible shoe adhesive or contact cement, then press and clamp the sole while it cures. For holes or thin spots, fill the area with a rubber patch or repair compound. Allow the repair to cure for the full time listed on the product label, usually 24 hours, before walking on it heavily.
Is Gorilla Glue good for repairing shoe soles?
Gorilla Glue can bond rubber soles, but it expands as it cures and can leave a stiff, foamy bead that cracks under flexing. A flexible shoe adhesive or contact cement designed for rubber is usually the better choice for soles that bend with every step. Gorilla Glue may work for small rigid repairs, but test it on an inconspicuous area first.
When should you replace a shoe sole instead of repairing it?
Replace or resole the shoes when the tread is worn smooth across the entire forefoot and heel, when the midsole or cushioning is compressed or broken, or when the upper is also failing. Repairs are best for localized damage such as a single hole, a crack in one area, or a small separated edge. If the sole has separated along most of its length, a professional cobbler may be a better option than a DIY fix.
How much should it cost to resole a shoe?
Pricing for resoling depends on the shoe type, the material, the amount of work required, and the cobbler you use, so check with a local shoe repair shop or the service provider directly for a current quote. A DIY repair typically costs only the price of adhesive or a patch kit, but results vary with the damage and the skill of the repairer. Compare the expected lifespan of the repaired shoe against the cost of a new pair before deciding.
